
Wildfire Minigames Collection
Implementation: Simulating Dual-Lane Evacuation Traffic

One thing we heard again and again while exploring wildfire evacuation stories was how challenging evacuations become, especially when residents are trying to take two cars to save more belongings or bring along trailers, pets, or equipment.
To bring this experience into the game, we needed a traffic system where cars could move along dual-direction roads and make meaningful choices under pressure. That’s why we developed a custom car navigation system. Why not NavMesh? For our small, grid-based map, NavMesh can be overkill and doesn’t handle our layout very well — we created a lightweight, flexible alternative.
How It Works
Every road tile prefab contains a set of manually placed Marker objects—think of these as nodes that define where cars can go.
public class Marker : MonoBehaviour
{
    public Vector3 Position => transform.position;
    public List<Marker> adjacentMarkers; // manually assigned
    [SerializeField] private bool openForConnections; // neighbor auto-link flag
    public bool OpenForconnections => openForConnections;
}
These are positioned and connected directly in the Unity Inspector, giving us clear control over:
- Which direction cars can turn,
- Which lane they’re in (inner or outer),
- And how traffic flows through corners, intersections, or straightaways.
Markers on the same tile are manually linked using the adjacentMarkers list. For connections between neighboring tiles, we use a simple flag: if a marker has openForConnections enabled, the system will automatically connect it to the closest marker on the adjacent tile during pathfinding.
Under the Hood: Graph & AStar Pathfinding
When a car spawns, the ATC_AIDirector builds a custom graph from the tile path between the car’s start and destination.
- Each
Markerbecomes a vertex. - Each
adjacentMarkercreates an edge. - If
openForConnectionsis true, the system links to a nearby marker on the next tile.
foreach (var marker in markersList)
{
    graph.AddVertex(marker.Position);

    foreach (var neighbor in marker.adjacentMarkers)
    {
        graph.AddEdge(marker.Position, neighbor.Position);
    }

    if (marker.OpenForconnections && i + 1 < path.Count)
    {
        var nextTile = placementManager.GetStructureAt(path[i + 1]);
        var targetMarker = nextTile.GetNearestCarMarkerTo(marker.Position);
        graph.AddEdge(marker.Position, targetMarker);
    }
}
This graph is passed into a lightweight AStar pathfinding algorithm, which calculates the best route across connected markers. It works great for short routes and lets us simulate subtle but impactful traffic behavior.
The A* search is run like this:
public static List<Vector3> AStarSearch(AdjacencyGraph graph, Vector3 start, Vector3 end)
{
    var startVertex = graph.GetVertexAt(start);
    var endVertex = graph.GetVertexAt(end);
    // pathfinding logic ...
    return GeneratePath(parentsDictionary, endVertex);
}
It uses Manhattan distance and constant edge cost (1f) to simplify runtime cost:
float priority = newCost + ManhattanDiscance(end, neighbour);
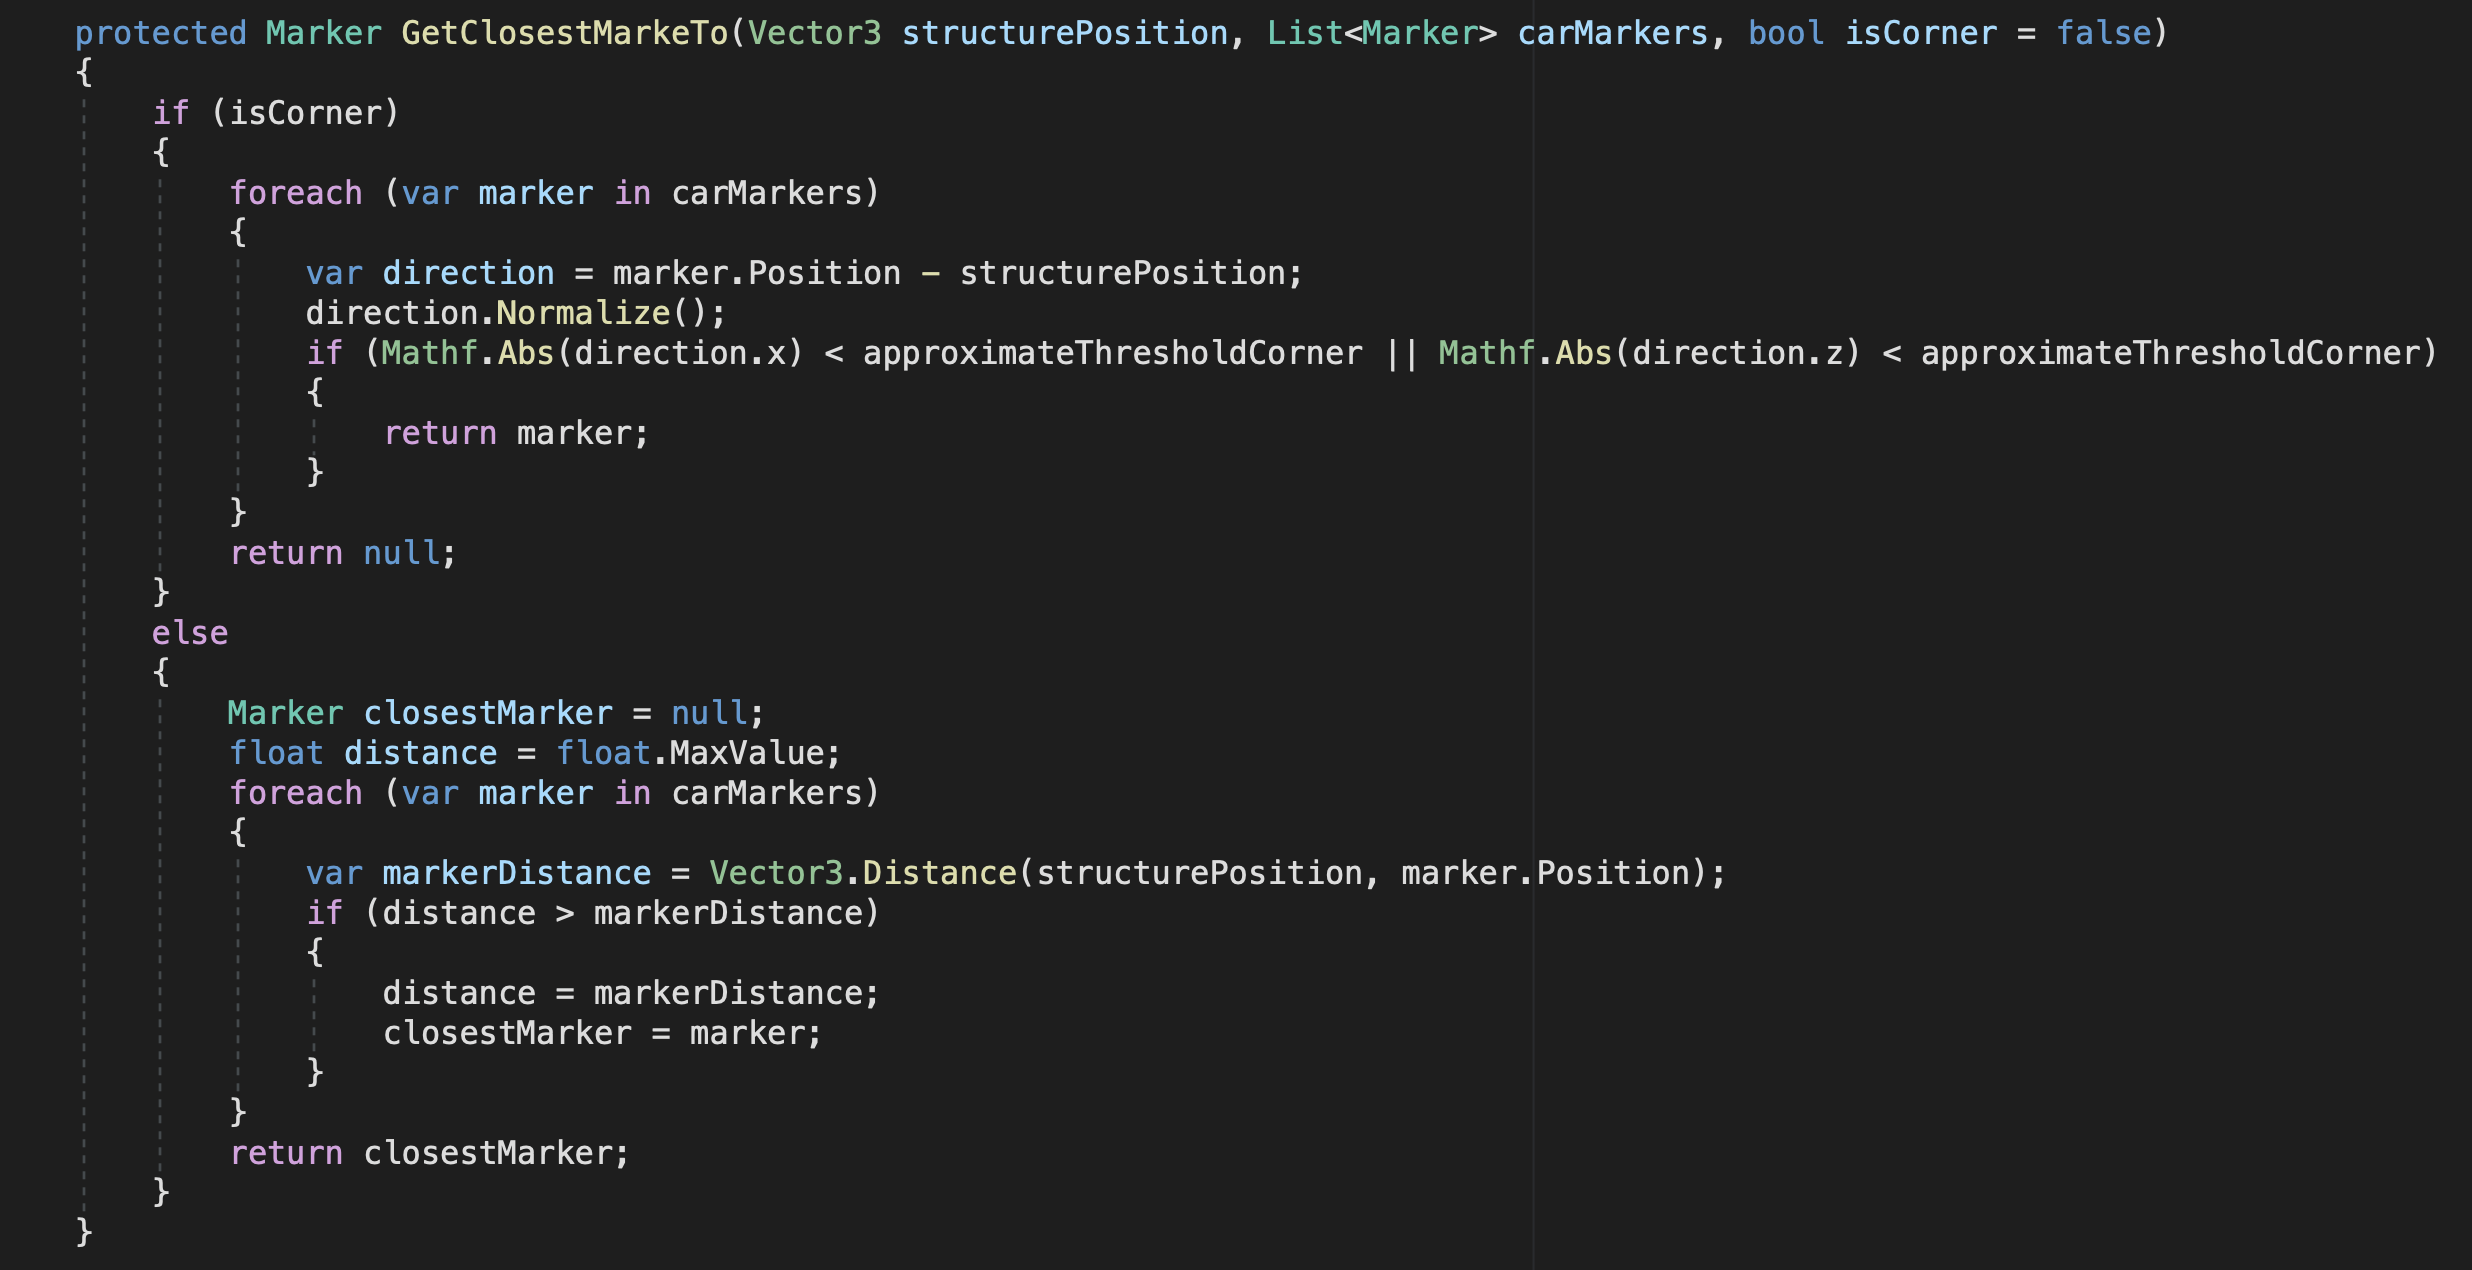
RoadHelper & Marker Selection
Each tile uses a RoadHelper-derived class to expose marker logic. For example:
public virtual Marker GetPositioForCarToSpawn(Vector3 nextPathPosition)
{
    return useInner ? innerOutgoing : outerOutgoing;
}
Or, for tiles that support multiple lanes (e.g. RoadHelperMultipleCarMarkers):
public override Marker GetPositioForCarToSpawn(Vector3 nextPathPosition)
{
    return useInner
        ? GetClosestMarkeTo(nextPathPosition, innerOutgoingMarkers)
        : GetClosestMarkeTo(nextPathPosition, outerOutgoingMarkers);
}
This allows cars to spawn from the correct lane given the upcoming direction.
Car Behavior During Simulation
Cars are assigned paths at runtime:
car.GetComponent<CarAI>().SetPath(carPath);
And internally follow those points:
Vector3 rel = transform.InverseTransformPoint(currentTargetPosition);
float angle = Mathf.Atan2(rel.x, rel.z) * Mathf.Rad2Deg;
int steer = angle > turningAngleOffset ? 1 : angle < -turningAngleOffset ? -1 : 0;
Basicall, the car can:
- Stop temporarily at defined “stop points” (
SetStops) - Check for fire on collision:
if (other.CompareTag("Fire") && !sawFire)
    HandleFireDetection();
- May respawn and re-route:
ATC_AIDirector.Instance.RespawnACar(car.start, car.ends, car.carSpeed);
What This System Lets Us Do
-
Split cars across lanes using inner or outer markers to simulate realistic dual-direction traffic.
-
Support multiple stops, like picking up kids at school or loading a trailer.
-
React dynamically to hazards—cars can reroute if they spot fire, or respawn if they get stuck.
-
Create realistic consequences when too many vehicles use the same exit routes, mirroring real-world evacuation challenges.
Wildfire Minigames Collection
A collection of minigames to help people develop preparedness and resilience to wildfire
| Status | Released |
| Authors | Wildfire UCSC, Yiyang Lu |
| Genre | Simulation |
| Tags | minigames, wildfire |
More posts
- Finding Your Community9 hours ago
- Launching a Game for Impact: The Challenges without a Marketing Budget1 day ago
- The Benefits of Multiplayer, and How to Keep it in Scope2 days ago
- Approaching User Experience: Crafting an Interactive and Immersive UI2 days ago
- Art Direction: Why We Chose a Stylized, Low-Poly Look for Our Wildfire Games4 days ago
- Tech Discussion: Simulating Fire That Feels Real4 days ago
- From Workshop to Production – Turning Community Stories into Playable Scenario...5 days ago
- Critical Interdisciplinarity6 days ago
- When Good Ideas Go—Iterating with Communities and Experts7 days ago
Leave a comment
Log in with itch.io to leave a comment.